Thinking of You this Thursday

Thinking of You 3


Thinking of You this Thursday

Hi everyone!  First of all, a little reminder to head over to the Crafty Secrets blog and join the Linky Party!  Every participant gets a $6 store credit, and one lucky participant will win $50; you have until August 17th, don’t delay!

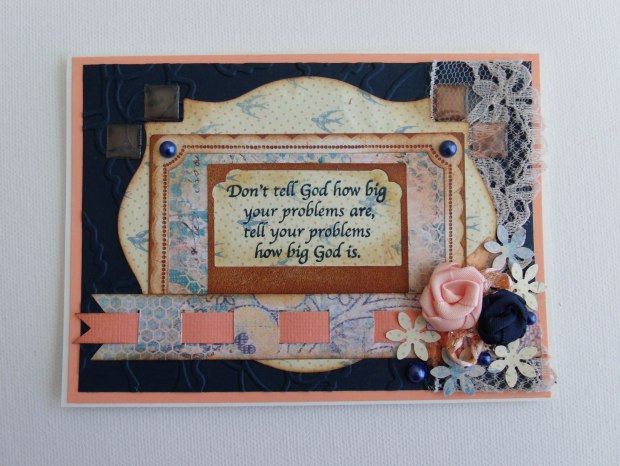
It’s been a busy week for me, and I haven’t quite gotten as much done as perhaps I should have, but I made it by the blog today to share a card with you!  Take a look:

Thinking of You 1

This creation was made using a bundle of scraps I had paperclipped together some time ago.  It’s the most useful way I’ve found to use up my scrap paper – paperclip it together into little sets, and when you want to make a card, grab a set and go!

The most interesting thing about this card is all the fussy cutting.  The little pink overlay in the background started as a whole sheet of paper run through an embossing folder…I then proceeded to cut around the raised design because I’m just a little bit insane.  But I love the result, and that’s what counts, right!?

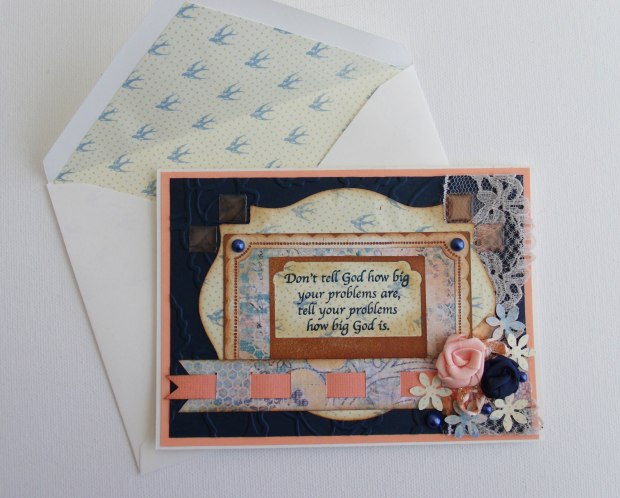
Here’s a picture of the inside:

Thinking of You 2

That’s it for me!  Thanks for stopping by, I hope you have a lovely day!

Ombre Congratulations Graduate Card

ombre congrats grad 2

Ombre Congratulations Graduate Card Duo

Happy Friday!!!  I’m finishing out the week with another duo of graduation cards for you – probably the last of them for a while.  I’m pretty notorious for saving small scraps of paper, and today’s cards were an attempt to put some of those scraps to good use.  Take a look:

ombre congrats grad 1

Each strip of paper was cut to the same size then adhered to another small sheet to keep everything in place.  When I had all the little scraps lined up in the order I wanted, I chose an embossing folder and ran the whole thing through my Cuttlebug.  Then it was a matter of adding some string (and a tassel!), choosing a background layer, and die cutting my sentiment.  It was really quite simple!

That’s it for today!  I hope you found some inspiration.  Have a lovely weekend!

Big Problems Card

Hello, everyone!  Did you all have a nice 4th of July weekend?  I know I did!  It was filled to the brim with fun family times, laughter, food, games, and swimming.  Boy, was it hard to get out of bed this Monday morning!

Today’s card was made for a family who went through an awful lot of tough stuff in the last month or so, and I just wanted to make sure they knew that our thoughts and prayers were (and still are!) with them.  I found the perfect sentiment in my stamp collection.  Take a look:

big problems 2


All of the paper (except the peach cardstock there on the bottom) came from one of my scrap “kits,” handily paper-clipped together for easy card making.  The two frames are stickers from my stash, and I made the satin flowers from scraps of ribbon.  Most of the edges are inked with Vintage Photo distress ink to add just a little pop to each layer.  I love the layers.  I had a really hard time deciding on the layout of this card with all those lovely layers, but I’m pretty pleased with the final result.  One of my favorite bits is the navy layer; it’s hard to see, but I ran it through my Cuttlebug  in one of my many embossing folders for a hint of texture.  And I just love the color palette.  Hooray for using scraps!

I even had enough paper left over to line the envelope!

big problems 1


Thanks for stopping by!  Have a wonderful Monday!

big problems 3

Another Father’s Day Card – Using Paper Scraps

Happy Monday, everybody!  I was able to make more time the other day for another Father’s Day card, so I thought I’d share it with you!  Check it out:

Dad 1


I recently went through all my paper (well, all the paper I brought with me) and organized it- paper-clipped together coordinating pieces for future cards, color coded all my solid card stock, and bit the bullet and got rid of some scraps that I would realistically never use.  You see, I have the hardest time throwing away even the smallest bit of paper, thinking, “oh, but I could make a flower out of this!  This would be perfect for…someday…” and then I rarely use said smallest bit of paper.  Well, I kept some of my larger-but-still-possibly-too-small-to-realistically-use-on-a-card pieces, and then rejoiced because they were perfect for this Father’s Day card!  I cut one strip of each different blue to the same size, layered them onto a piece of white paper, then ran that through my Cuttlebug using my diagonal stripes embossing folder.  Then, I stuck a brad in each corner and layered that whole piece onto light blue card stock and attached the whole thing to my card base.  I die cut the shapes and added “DAD” using old rub-on letters that I’ve had in my stash for ages, then popped it up using foam squares.  The inside was left blank for plenty of note-writing space.

I’m pretty proud of this simple card!  I used up some of my scraps, kept it simple and classy, and even got a little ombre-action going 😛  It’s very popular these days.

Thanks for stopping by!  I hope you enjoyed your visit 🙂

Dad 2